
Using Blazor Components in Angular Projects
But let me guess – you are very busy and do not have time to watch a 40-minute video of me talking? I know what you mean…so here’s a straightforward guide that you can implement and continue your day!
First, what are custom elements? Custom elements are classes that extend the HTML element and in turn can be used in html with element tags. For example:
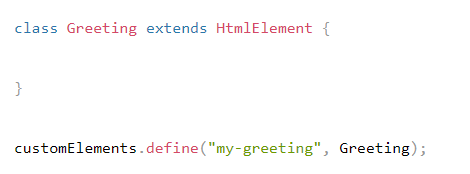
This is a basic custom element being initialized (HTML element, no Blazor here).

After this, the element can be used with a regular element tag in your HTML.
Now, by using .NET 7 or greater, we can register our Blazor components as custom elements, and use them in a similar manner.
For some background, I ended up diving into using Blazor components as custom elements because of a tricky issue with an Angular project. The client had several large, dynamically built grids (Kendo UI for Angular) in their web application and wanted a drag and drop feature on the grids. The grids did not have built in support for drag and drop, so we built it out with regular HTML/JS. Unfortunately, the result was unbearably slow and not usable.
However, the Telerik UI for Blazor grid does have built in support for drag and drop, and it works smoothly with the data heavy grids! This was a potential solution, but I needed to get the component into the Angular project. This is a lot of background just to say – in this situation, a Blazor component would have worked better for the project, therefore we wanted to use it.
While researching, I discovered there were several ways to embed Blazor custom elements, but I couldn’t unearth a single blog or video guide that was fully functional once implemented. They were either for Blazor Web Assembly (WASM), just JavaScript, or missing pieces of crucial information. By cobbling these resources together, I was able to successfully implement my Blazor server-side component into an Angular project. Maybe now it’s just a “Blangular” project!
Setup Your Projects
For clarity’s sake, this article is about accomplishing this with Server Side Blazor. While it’s also possible to use Blazor Web Assembly components as custom elements, I’m not demonstrating that here.
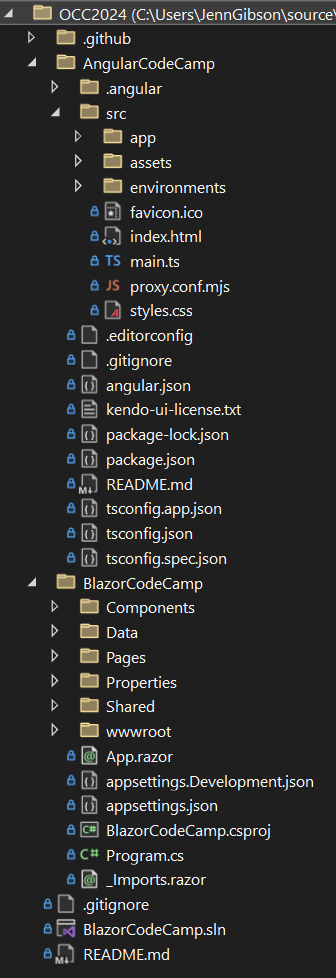
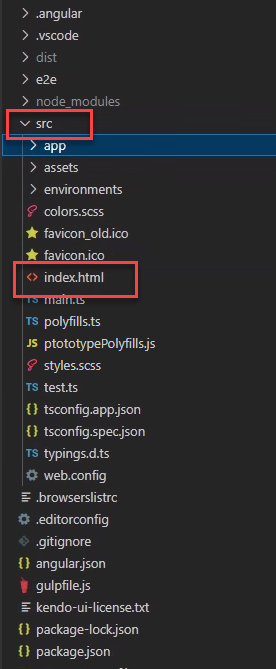
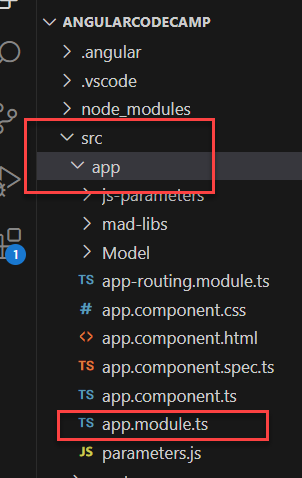
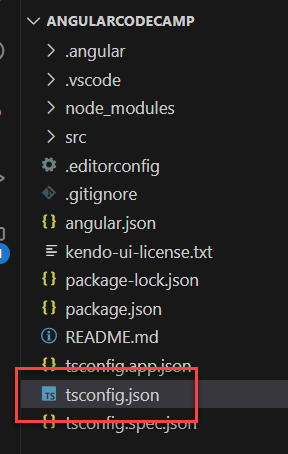
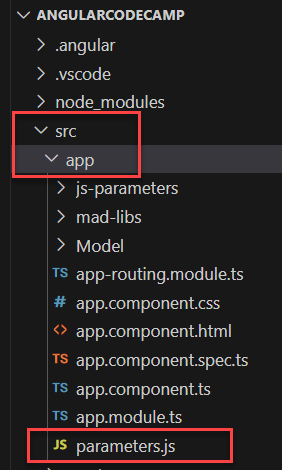
You will need a Blazor and Angular project set up to begin. Here is an image of my file structure:
Blazor Setup
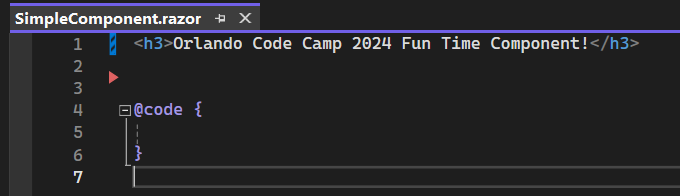
Let’s begin on the Blazor side of the app because it’s the least complicated! The first step here is to create the Blazor component that you want to use. In this example, I have a really simple component that just has an <h3></h3> element in it.
After the component is created, we need to import the necessary NuGet packages. There are two:
Microsoft.AspNetCore.Components.CustomElements
Microsoft.AspNetCore.Components.Web
Both of these packages work in tandem to provide the mechanisms that wrap the component into a custom element – they’re the magic!
The last part of the Blazor setup is in the Program.cs file. In this file you need to register your component(s) as a custom element(s).
In the builder.Services.AddServerSideBlazor section, register each component using the following syntax:

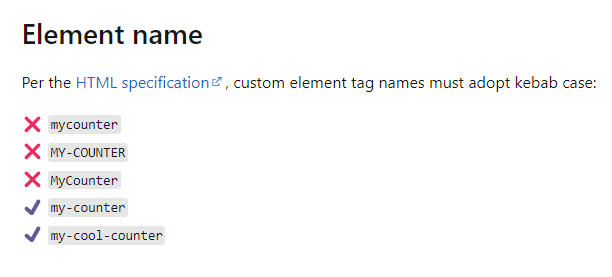
The string in the parenthesis (“simple-component” in the example above) is what you would like the element tag to be when you get to the Angular side.
Per HTML specifications, custom element tags must be in kebab-case, which is all lowercase with hyphens. This was a large frustration for me when I was getting started and is important to remember.
That’s all you need to do to set up the Blazor side!
Angular Setup
Index.html file changes:
The first change you need to make in Angular is in the Index.html file. The Index.html file is generated for you when you create a new Angular project and is located in the src folder of the directory.
Within this file you need to add two script tags within the head of the file. The first script tag connects us to the custom element NuGet package we installed on the Blazor side, and the second runs Blazor server, which is a pretty key piece. For your copy and pasting ease, here they both are:
<script src=”_content/Microsoft.AspNetCore.Components.CustomElements/Microsoft.AspNetCore.Components.CustomElements.lib.module.js”></script>

<script src=”_framework/blazor.server.js”></script>
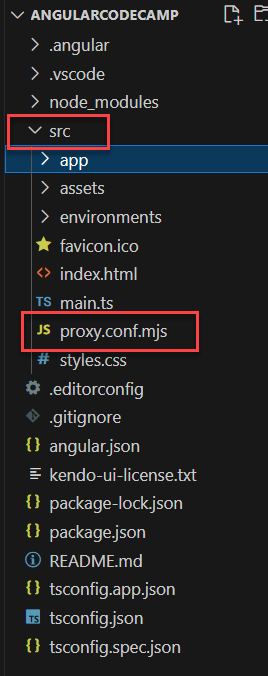
Proxy.conf.js file:
In this app setup, the Blazor/.NET project is running on localhost:5203, and the Angular project is running on localhost:4200. What this means is that when Angular tries to load the Blazor component, it’s going to look for the component on 4200 – and it won’t find it.
This demo is all done locally, in your application you will need to adjust the information for production and staging use.
To remedy this problem, we are going to add a proxy.conf.js file. This will go in the Angular src folder.
It’s a rather simple file, and all it needs to contain is the following:
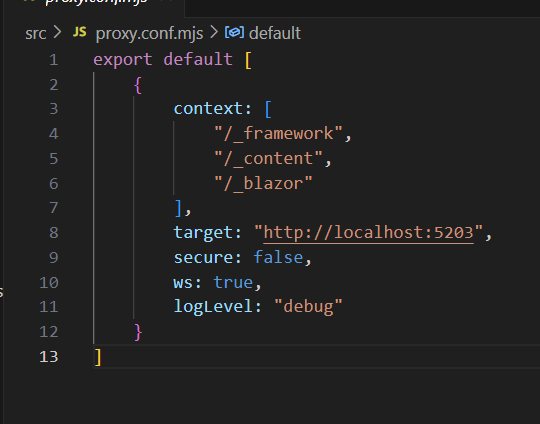
When it’s running, the app will look for calls that include the strings in the context section, and if it sees any it will change the domain information from localhost:4200 to localhost:5203, which the file has been told to use in the target section above. You’ll recognize the “/_content” and “/_framework” strings from the script tags we added prior.
Now that we’ve created the file, we need to tell the application to use this file.
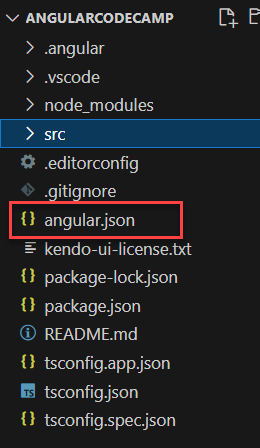
Angular.json File
We’re going to make changes to the Angular.json file so that on build, the app knows to use the proxy file we just created. The Angular.json file is the root folder of the app.
Locate the “serve” section of the JSON, and then within its “options” section, add in “proxyConfig” : “src/proxy.conf.js”
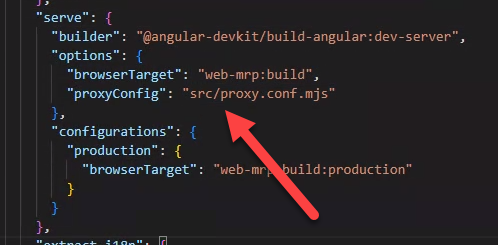
Now when the app builds, it will know to check the proxy file when making calls, and our proxy.conf.js file is set up to use localhost:5203 for any of those calls including “/_blazor”, “/_content”, and “/_framework”. With that done, we are close to finishing setup!
App.module.ts file:
For the last piece of setup, we need to let Angular know that we will be using custom elements, and if it encounters any non-standard elements to treat them as such.
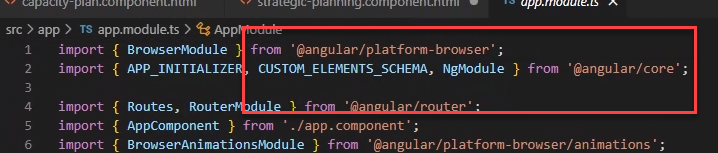
We will do this in the app.module.ts file, which is in the src > app folder.
At the top of the file where we are doing our imports, we will add an import for “CUSTOM_ELEMENTS_SCHEMA” from ‘angular/core’. ‘angular/core’ will already have imports in this file so you will just need to pop it in the existing import.
Within the @NgModule, find the “schemas” section, and add in the CUSTOM_ELEMENTS_SCHEMA you imported above.
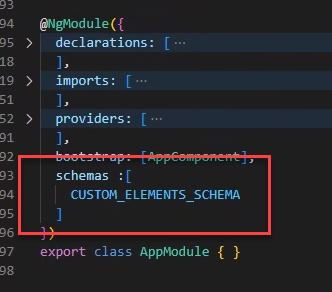
With the addition of CUSTOM_ELEMENTS_SCHEMA, we are now officially able to use our Blazor component!
Putting It Together
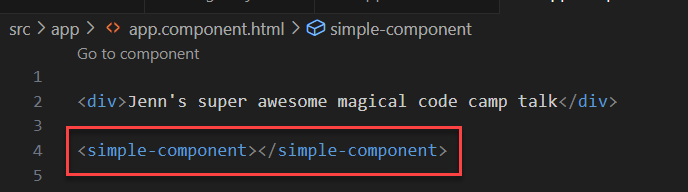
To use your Blazor component, navigate to whichever Angular component/page you would like to display the component on. Insert your Blazor component by using the element tag you defined back in the Blazor app when registering your component as a custom element.
We’ve come a long way since registering the components, so here’s a quick reminder of where you defined yours in the Blazor project Program.cs file:

Now, you can run both your apps and you will be able to see your Blazor component wherever you placed it in the Angular page!
Congrats on making it this far! Getting the Blazor component in your Angular project is great, but there’s still a question out there about how to make the most of this. How do we pass parameters? We definitely need some parameters.
Parameters
There are three different ways to pass parameters into your Blazor component.
Let’s begin with attribute style parameters. Attribute style parameters can be used for any standard types like strings, Booleans, and numerical types. There are two ways to do this.
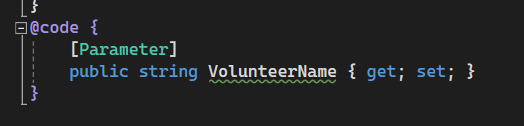
On the Blazor side, add a parameter to your component as you normally would, with the Parameter attribute. In the example below, I used “VolunteerName”. Note the capitalization on the parameter is using PascalCase (each word is capitalized). The casing for the parameters can be very finicky, much like earlier when we registered the component using kebab case. I’ve found that if you’re troubleshooting, checking casing is a good place to start.
Then, on your custom element in Angular, add the parameter using kebab-case and set it equal to whatever you would like the parameter to be. As you can see in this demo, the parameter is a string, and I’ve set it to a value of “Grace Hopper”.

When you run your apps again, you will now have access to the “Grace Hopper” value on your Blazor component.
However, we pass variables as parameters far more often than hard-coded strings. To use variables as parameters, we just need to make two small changes to the element in Angular. Place square brackets around the parameter name on your element, and then add the “attr.” modifier before it. Once this is complete, you can set it equal to your variable.
In this example, the parameter is “proper-noun,” and the variable is “properNoun”.

Again, now when you run your apps you will have access to the properNoun variable in the Blazor component.
These two ways of passing variables into the Blazor component will not take objects, just standard types. There is one more way of passing variables that can be used with objects of any JSON serializable type, and that way is plain JavaScript. However, as we know, Angular uses Typescript, so we need to do a little more setup.
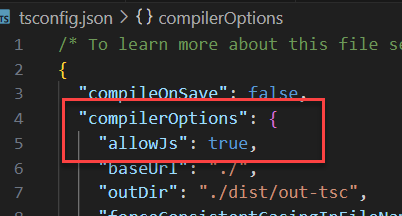
In your tsconfig.json file, found in the root folder, under compilerOptions, add in “allowJs”:true.
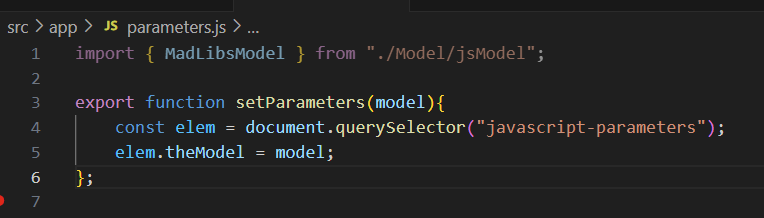
Next, add a JavaScript file in your src > app folder.
Within the JavaScript file, add and export a function. The function will use a document.querySelector(“your-element-tag-here”) to get your custom element. The string will be the name of the custom element you are passing the parameter to.
Then, set the variable on the element (in camel case now, for some reason) equal to your object. In my example, I’ve passed the object value into the function and used the passed-in value to set the parameter on the element.
On the Blazor side, make sure you have a matching parameter set that is a model with the same properties you’re sending.

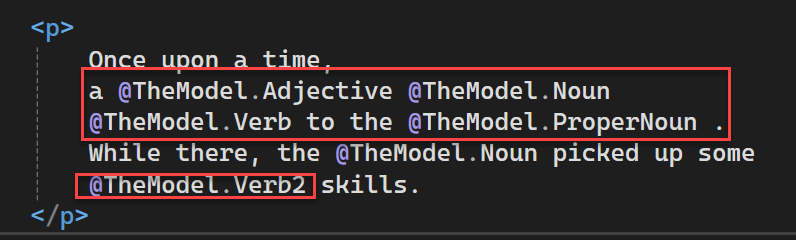
Now, you will be able to access the entire object and all its properties in Blazor. As you can maybe tell in this example, the model parameter here was used for a game of mad libs.
These are the three different ways we can pass parameters with custom elements. The downside here is that currently we cannot, in any standard way, send data back to the Angular parent component from Blazor. Hopefully that will change in the future!
In conclusion, with a little bit of setup and a lot of attention to the necessary casing (PascalCase, camelCase, and kebab-case) we can get Blazor custom elements running in Angular relatively quickly. We can even use parameters with the elements! This was a challenging but fun skill to learn, and I hope this demo got it working for you much quicker than I was able to get mine off the ground.